Host Guide
Everything you need to run a game night, start to finish — from setting up your group to running the tournament clock.
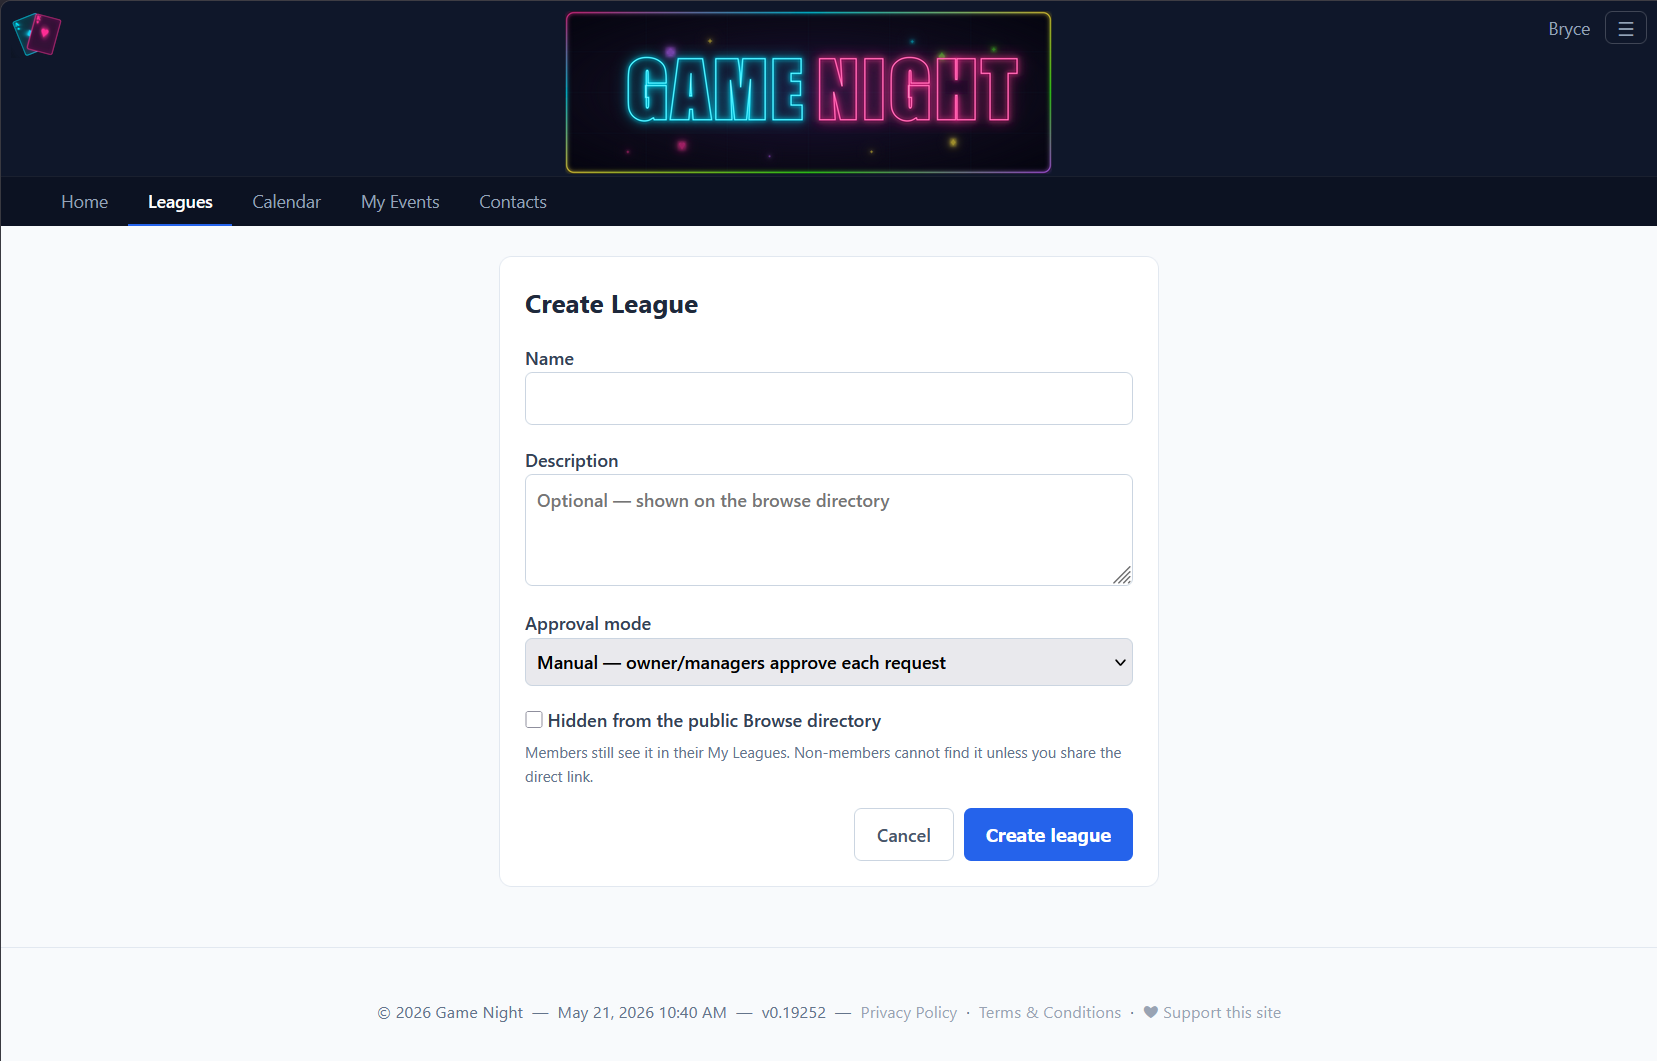
1 Set up your league (optional)
A league is your private group — your poker crew, board game club, or any circle. It scopes events, contacts, and stats so different groups don't see each other's stuff.
From the home page, open Leagues in the nav and create one. Give it a name and you're done.
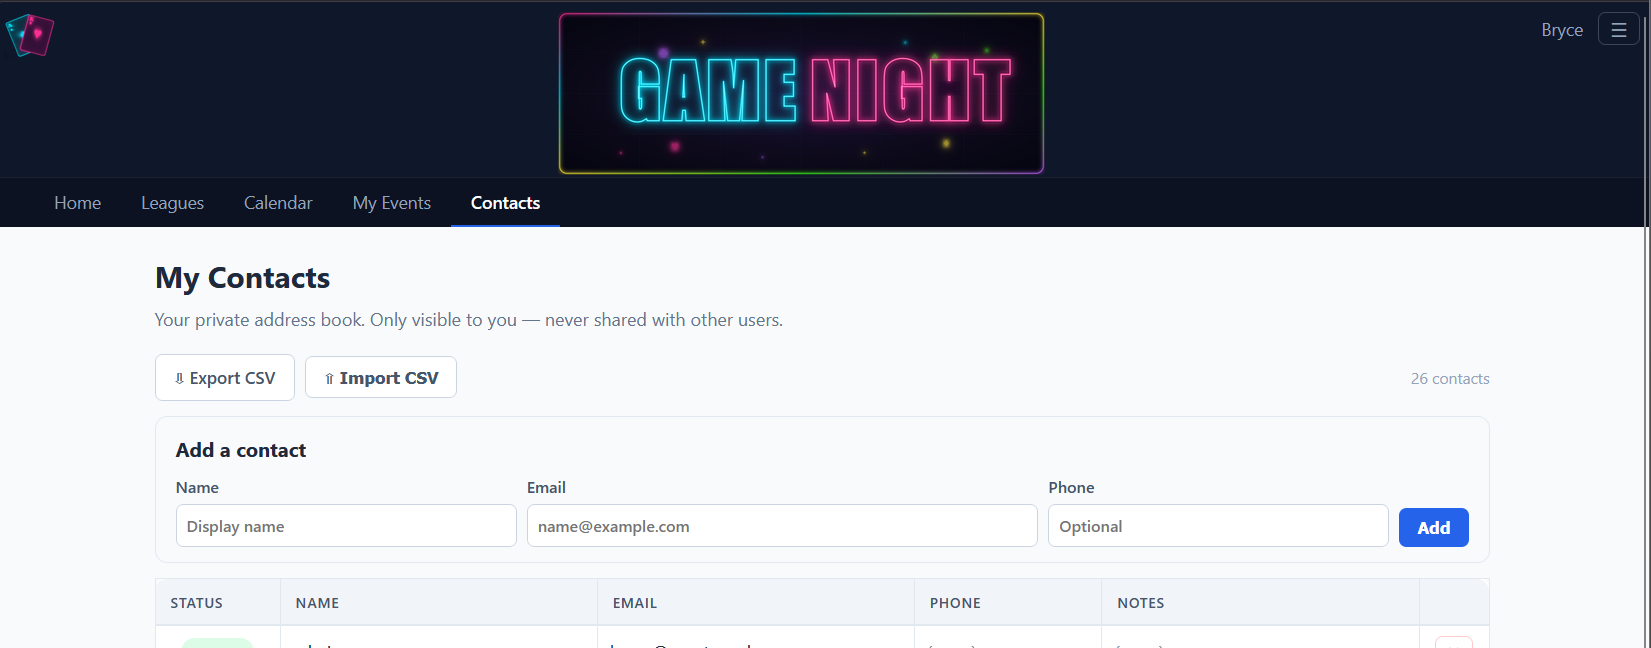
2 Add your roster (optional, but recommended)
Open Contacts and add the people you'll invite. You can add them by name plus email or phone — they don't need to sign up first.
- Bulk-add by pasting a CSV of names and emails
- When a contact later creates an account on the site, they auto-link to the entry you already made — no double work
3 Create the event
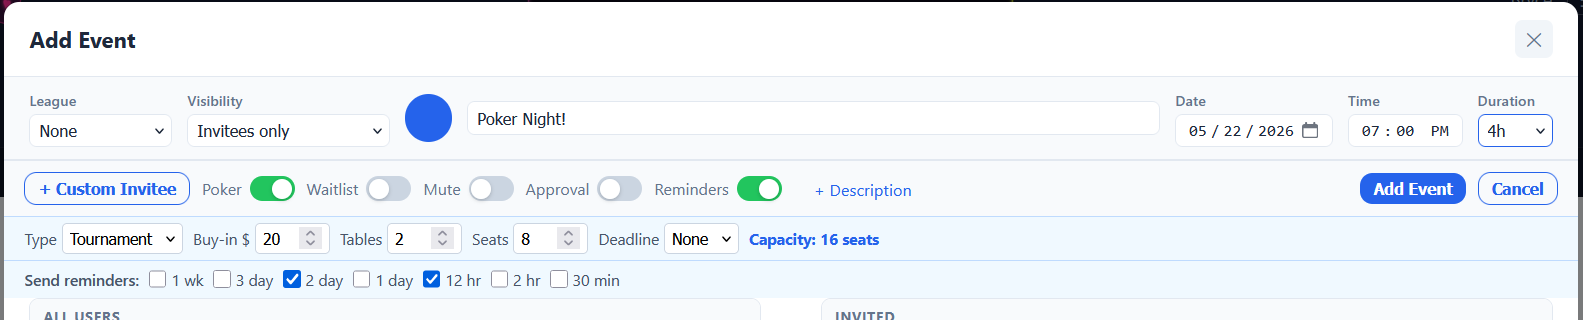
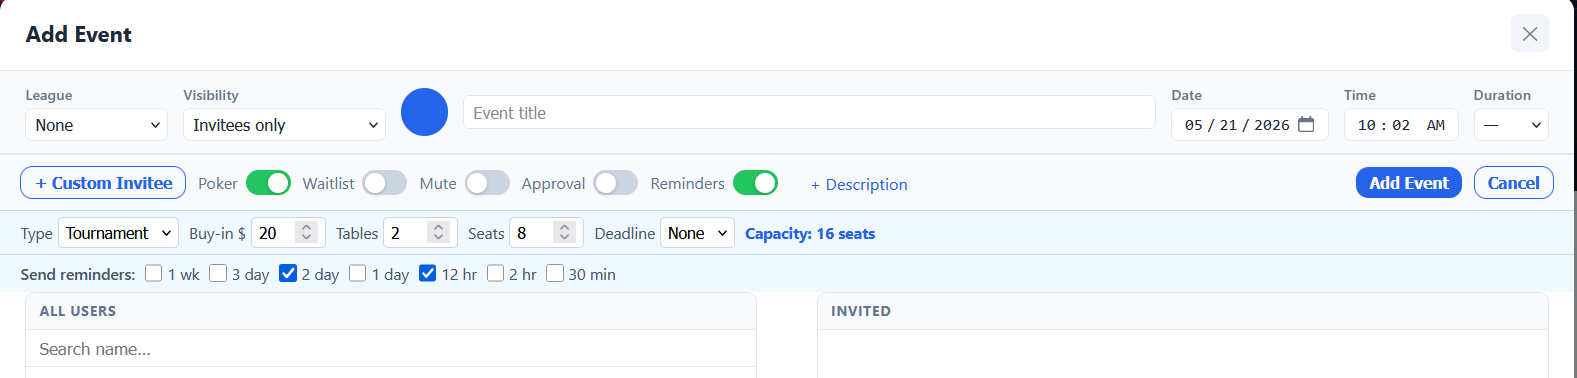
Open the Calendar and click New Event — or click the date you want directly on the grid. (You can also start one from My Events with the + New Event button.) The Add Event dialog opens.
Fill in the core fields:
- League — pick the group this event belongs to, or leave it on None.
- Visibility — Invitees only (just the people you invite), League members only (everyone in the league can see it), or Public.
- A color swatch to tag the event on the calendar.
- Title (required) and Date (required).
- Time (optional) and Duration (—, 30m, 1h, up to 8h).
Need notes for guests? Click + Description to expand a description box. When everything looks right, click Add Event (the same button reads Save Changes when you reopen an event to edit it).
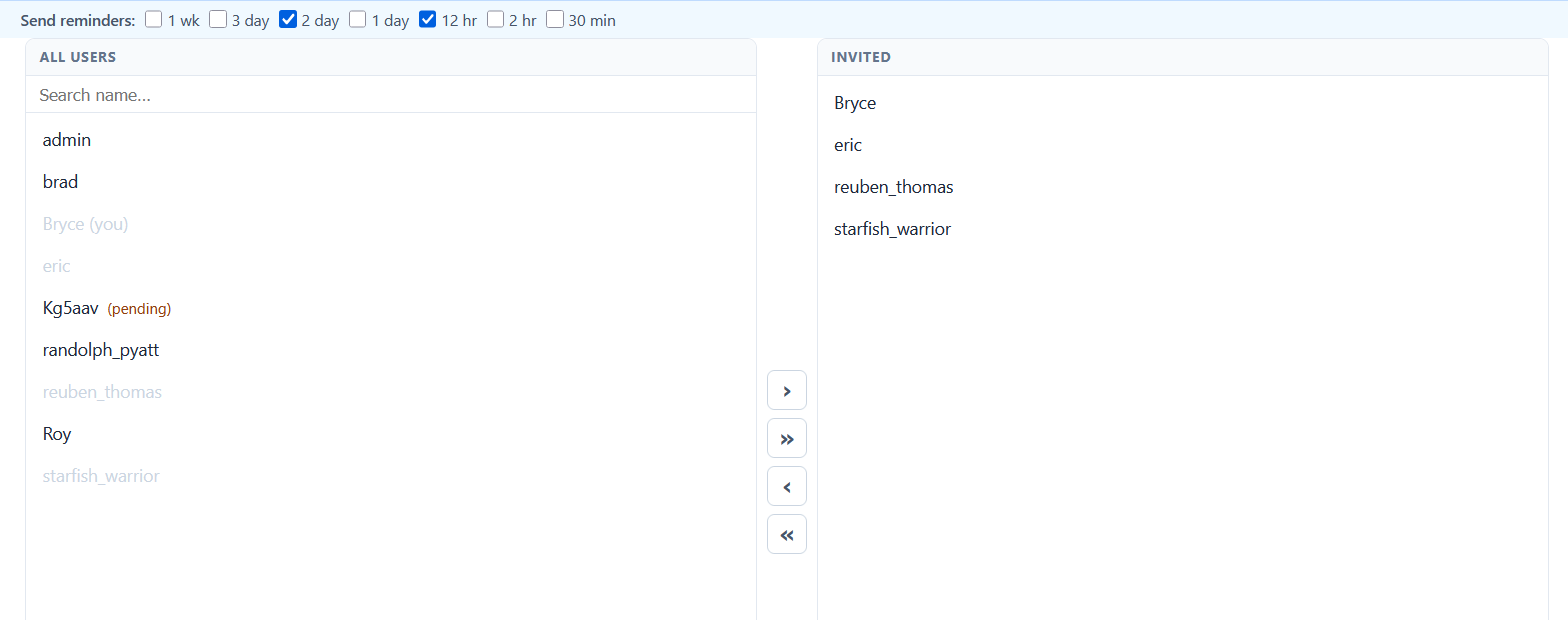
4 Invite your guests
Still in the event dialog, use the two-pane invite picker. All Users is on the left (search with the Search name, email, phone… box); Invited is on the right. Move people between the panes with the > (add selected), >> (add all), < (remove selected), and << (remove all) buttons.
- Inviting someone who isn't in the system yet? Click + Custom Invitee and type their email or phone inline — they don't need an account.
- For each invitee you can preset an RSVP (Yes / No / Maybe) and a Role: Invitee or Manager (a Manager can edit the event with you).
- On a league event, tick Hide non-members to narrow the left list to your league.
When you save, every invitee gets a one-click RSVP link delivered however they prefer — email, SMS, or WhatsApp — so they can answer without logging in.
5 Adjust the event's settings
The toolbar across the top of the Add/Edit Event dialog has the toggles that shape how the event behaves:
- Poker — turns on the poker setup: Type (Tournament or Cash), Buy-in $, Tables (1–50), Seats (2–12), and a Deadline (None / 24h / 48h / 72h). A capacity hint shows the total seats you've configured.
- Waitlist (appears once Poker is on) — once you're at capacity, extra guests are automatically marked Waitlisted.
- Mute — suppress notifications for this one event.
- Approval — RSVPs need your sign-off; guests sit at Pending until you approve them.
- Reminders (on by default) — expands a row of interval checkboxes: 1 wk, 3 days, 2 days, 1 day, 12 hr, 2 hr, 30 min. Tick the ones you want sent automatically.
To change any of this later, open the event, click Edit, adjust the toggles, and hit Save Changes.
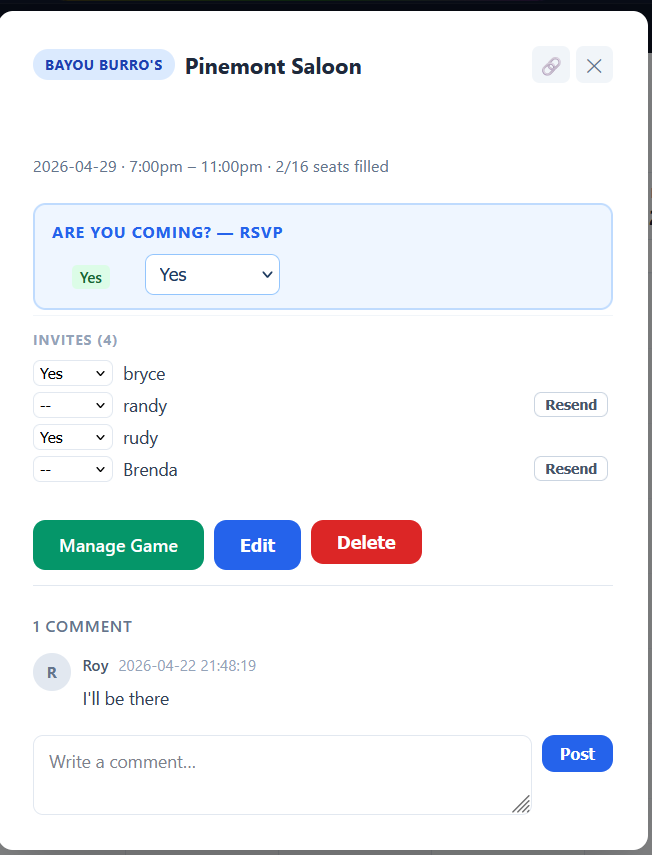
6 Track RSVPs
Open the event and look at the Invites list. You'll see each person's response — yes, no, maybe, or no answer yet — and you can change it for them or hit Resend to send their invitation again.
Reminder messages go out automatically before the event — you don't need to nudge anyone manually.
7 Start the game
On event day, open the event and go to Check-in. The first time you do, you'll see the Start Poker Session form:
- Game Type — Tournament or Cash Game.
- Buy-in $, and for tournaments also Rebuy $, Add-on $, Starting Chips, and Add-on Chips.
- Number of Tables.
Click Create Session & Import Players — this pulls in everyone who RSVP'd Yes. On the check-in dashboard you can add walk-ins with the name field and + Add, filter by All / RSVP Yes / Playing / Out, and let Balance auto-assign tables and seats. The QR button opens a registration screen players can scan to sign themselves in.

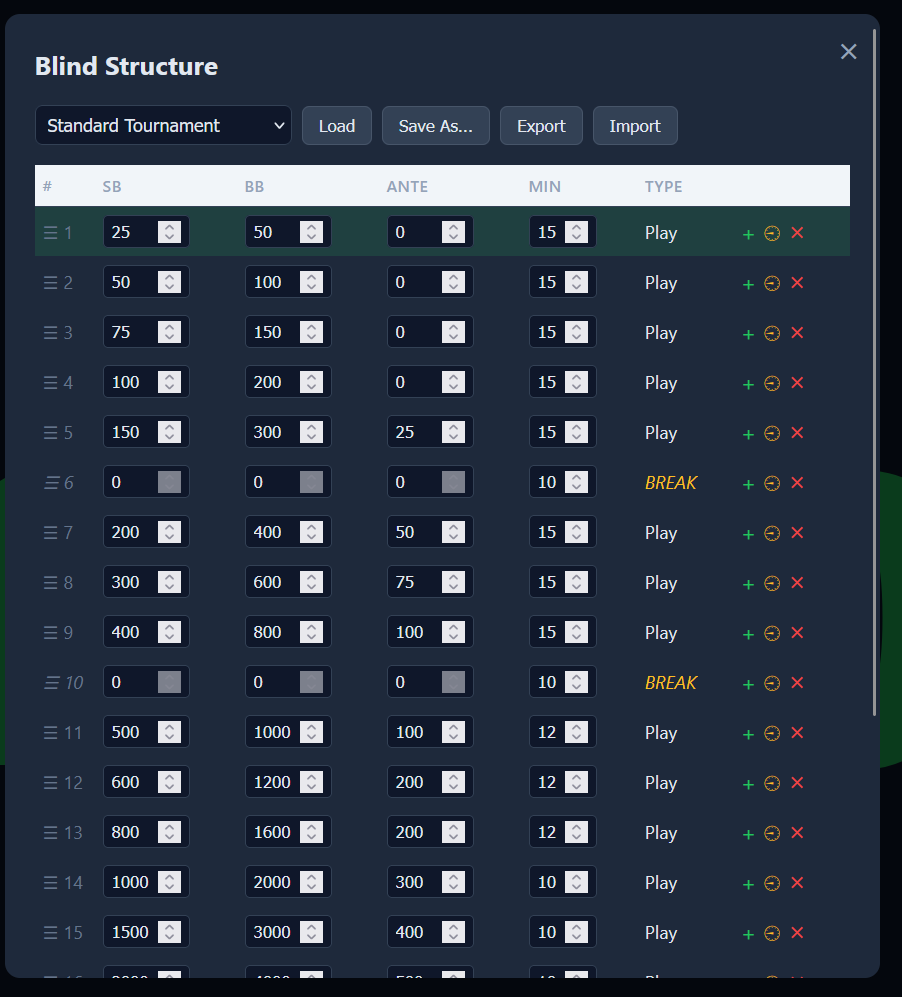
When you're ready to play, click the Timer button to launch the tournament clock. It loads your default blind structure automatically. To customize blinds, click Levels to open the Blind Structure editor (columns #, SB, BB, Ante, Min, Type) where you can + Add Level, + Add Break, then Save Changes — or Load / Save As / Set Default / Export / Import a preset.
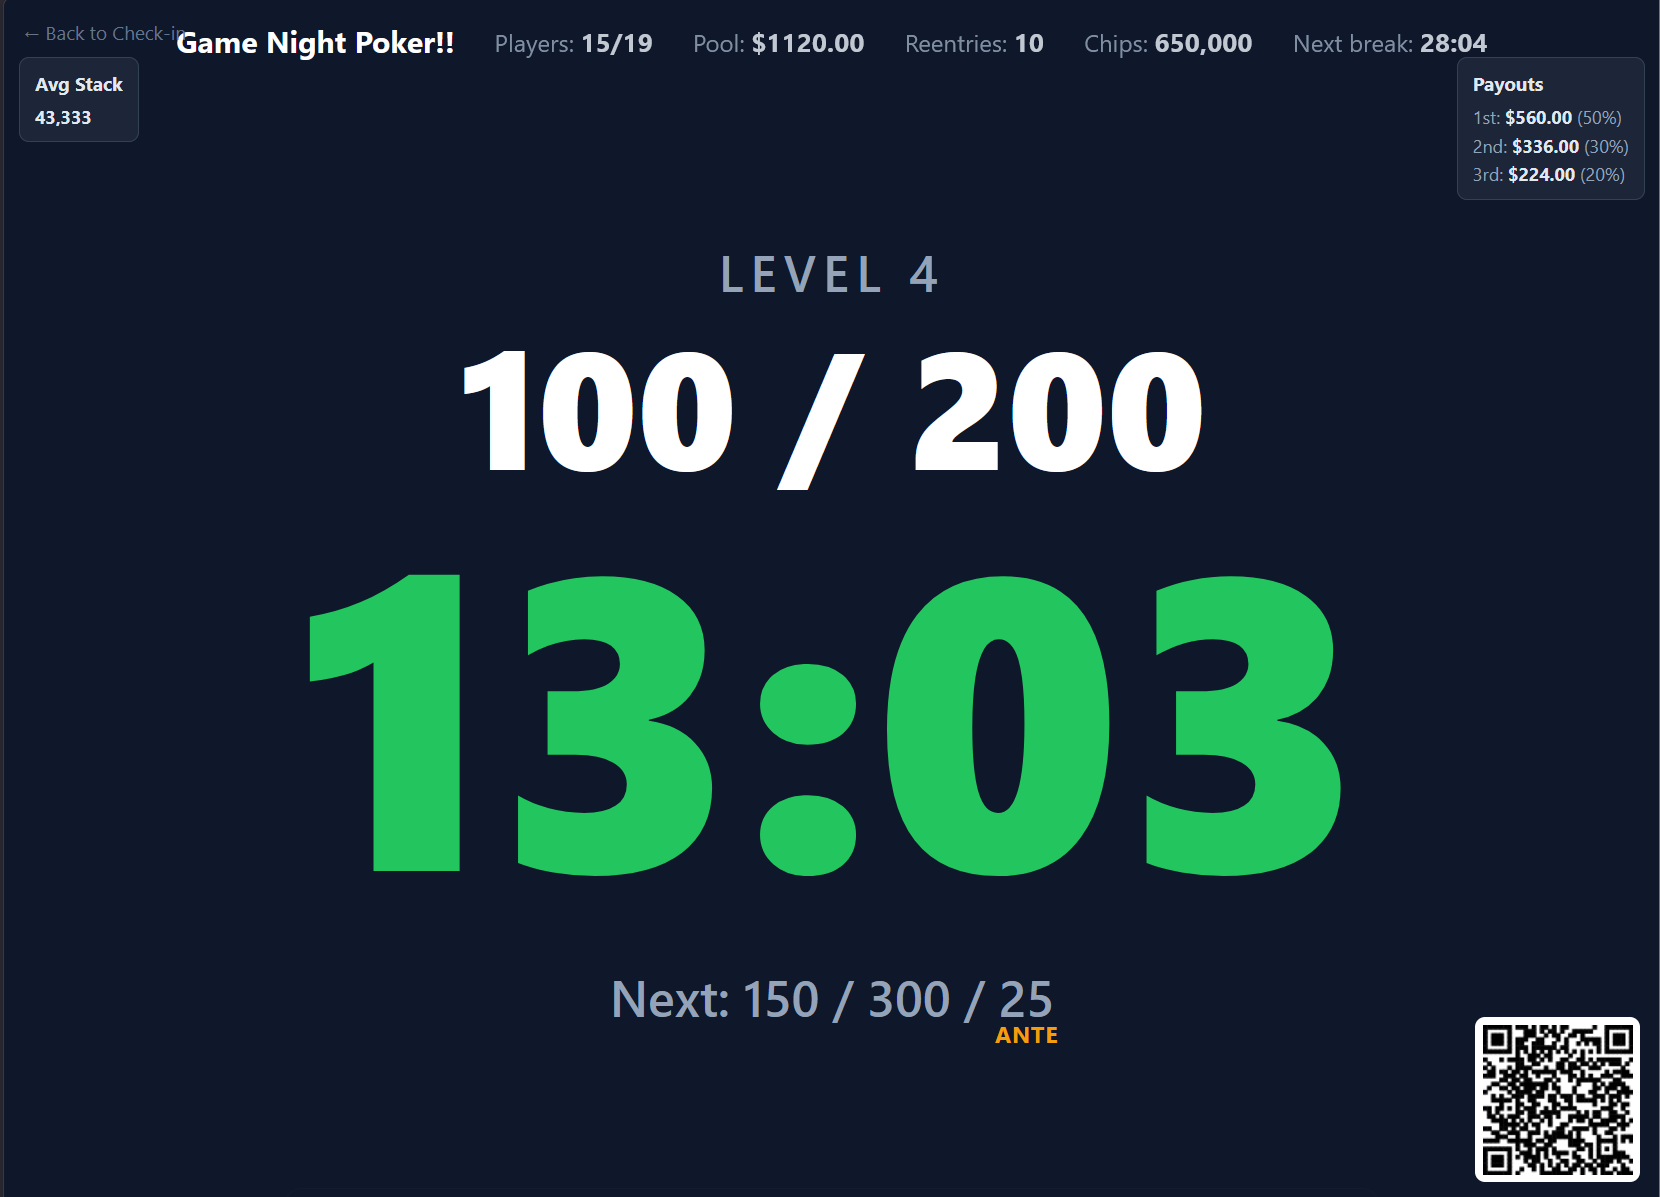
Run the clock with Start / Pause, step levels with Next and Prev, nudge the clock with −Min / +Min, and use Reset Level or Reset Timer if needed. TV opens a big-screen view for a projector, and Players lets you mark eliminations and rebuys as the night goes on.
That's it. After the event, results lock in and stats update automatically.
Ready to host your first game night?